Vim for Microsoft Notepad Users
Table of Contents
Introduction
This article’s objective is to map the features found in a simple text editor such as Microsoft Notepad1 to its Vim2 equivalents. The same concepts are also applicable to other text-only editors such as Textpad in Gnome. Likewise, most Integrated Development Environments such as Eclipse or Visual Studio implement a superset of Microsoft Notepad’s editing functions.

This text does not attempt to show how Vim may be more effective than Notepad or other alternative editors such as Emacs3; the aim is to help users quickly find themselves at home in Vim.
The first top sections deal with Notepad’s menus. The last three sections (Text Browsing, Text Selection and Text Modification) explain how to work with text outside the context of menu commands.
In all cases, if any of the described commands fails, press [ESC]
and try again. All commands work in Vim’s Normal mode which is
set by pressing [ESC]. Other modes such as Visual and Insert
are explained in the Text Selection and Text Modification
sections.
File Menu

The Notepad’s File Menu has the following commands:
- New: create new file
- Open: open file
- Save: save current file
- Save As: save current file with a new name
- Print: print current file
- Exit: exit application
New
In single window/tab applications such as Microsoft Notepad, creating a new file implies deleting the current file (if any) so that we can start entering new text from scratch.
Assuming that we are editing one file at a time, the equivalent of
the New command would be the bd (buffer delete) command in Vim:
| Notepad | Vim Only | Description |
|---|---|---|
[CTRL-N] |
:bd |
Start a new file (delete existing buffer) |
[CTRL-N] |
:bd! |
Same as above but ignore unsaved changes |
If an opened file whose recent changes are unsaved exists, we will get the following error:
1E89: No write since last change for buffer 1 (add ! to override)
When this is the case, we have to use the :bd! command if we
want to start a new file and disregard unsaved changes.
Open
The quickest way to start browsing the file system is by typing
:e . and pressing [ENTER]:
| Notepad | Vim Only | Description |
|---|---|---|
[CTRL-O] |
:e . |
Open file browser in current directory |
[CTRL-O] |
:e! . |
Same as above but ignore unsaved changes |
The dot . represents the directory from which we want
start browsing; as such, it may be replaced by a specific
directory. For example, in order to browse from the top directory,
we can type:
1:e /
From within the file browser, we can use the following commands:
| Command | Description |
|---|---|
| Arrow keys | Move around (may not work on remote connections) |
h,j,k,l |
Same as arrow keys (left,down,up,right) |
[ENTER] |
Open selected file or directory |
i |
Toggle among various display listing modes |
s |
Toggle sorting (name,time,size) |
d |
Create directory |
R |
Rename file or directory |
D |
Delete file or directory |
- |
Go one directory up |
:q |
Quit File Explorer |
If we are already editing a file and we want to open another one, we will get an error as follows:
1E37: No write since last change (add ! to override)
If we want to ignore the last changes to the current file, we can
append an exclamation mark ! to the e command. For example:
1:e! .
Please note that e is a shortcut for edit. Also ed is
equivalent. Furthermore, we may also enter the File Browser using
:E or :Explore but it is simpler to remember one single command
as we will see in the next section.
A specific file is also opened using the e command. In fact, the
file browser appears when the supplied argument is a directory
rather than a file. The actual syntax for the edit command e
is :e file. Some examples:
1:e README
2:e /tmp/deleteme.txt
3:e /etc/fstab
Vim supports auto completion. If we write :e followed by [SPACE]
and press [TAB], we will iterate through all the files available in
the current directory. We can use the auto completion feature to let
Vim complete the end of a filename. Let’s suppose that we only type
the first three letters of README:
1:e REA
Pressing [TAB] will complete README. If we press [TAB]
again, we will given the next file that matches the prefix,
if one exists at all, for example, README.old.
Be aware that if we want to ignore a currently modified
unsaved file, we need to append ! to e as explained in the
last section.
Last but not least, if we want to open a file from the shell,
we can type vim file, for example:
1$ vim FILE
Save
If we have modified an existing file and we want to save the changes
to disk (regular Save), then we use the w (write) command:
| Notepad | Vim Only | Description |
|---|---|---|
[CTRL-S] |
:w |
Save current file |
[CTRL-S] |
:w! |
Same as above but ignore overwrite error |
Save As
Saving a new file with a brand new name or saving an existing
file with a different name are both performed by specifying
an argument file to the w (write) command: [ESC]:w <file>.
| Vim Only | Description |
|---|---|
:w filename |
Save current buffer as filename |
:w! filename |
Same as above but ignore overwrite error |
Examples:
1:w notes.txt
2:w /tmp/myfile.txt
If the specified file already exists, Vim will show an error:
1E13: File exists (add ! to override)
To overwrite an existing file, we append an exclamation mark
to the w! command:
1:w! notes.txt
In general, most editing done in Vim concern file types that have some sort of markup that indicates how the file ought to be rendered by one or more processors. For example, LaTeX (.tex) files are usually compiled to PDF. Source code is often compiled to HTML (JavaDoc, Haddock, and so on).
Since Vim may not be able to invoke a Print Dialog, it is best to render the text file to a printer-friendly format and then use the Desktop Environment’s applications (PDF Viewers and so on) to perform the actual printing.
The ha (or harcopy) command can either print to the “default”
printer or convert the text to PDF and Postscript formats, among
others:
Optionally, invoking ha on its own will tell Vim to attempt
printing using the “default” printer:
| Notepad | Vim Only | Description |
|---|---|---|
[CTRL-P] |
:ha |
Print to default printer |
| n/a | :ha > /tmp/myfile.pdf |
Save printout as PDF |
| n/a | :ha > /tmp/myfile.ps |
Save printout as Postscript |
Exit
The :q command is used to exit Vim. Just like Notepad, Vim will
not allow us to quit the application accidentally if there are
unsaved changes. Therefore, we use :q! to ignore the error and
quit regardless of unsaved changes.
| Notepad | Vim Only | Description |
|---|---|---|
| n/a | :q |
Quit |
| n/a | :q! |
Same as above but ignore unsaved changes |
| n/a | :qa! |
Quit all open buffers and ignore all changes |
The option :qa! should not be required when using Vim like Notepad
(editing one file at a time). However, we may accidentally open
multiple buffers and perform changes in them; in this case the
simpler :q! form will only attempt to exit the current buffer.
Edit Menu

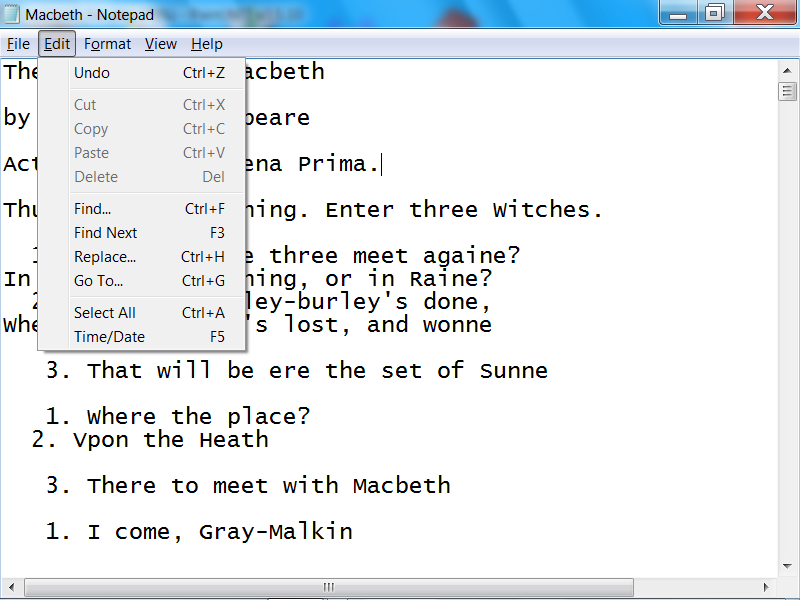
Edit commands help manipulate existing text and/or external text copied to the clipboard:
- Undo: undo last change (or redo last undo)
- Cut, Copy, Paste and Delete
- Find: find a text string
- Replace: replace an old text string with a new one
- Go To: jump to specific line number
- Select All: select the entire document
- Time/Date: insert Time/Date
Undo and Redo
Notepad has only one level of undo; therefore, the keyboard shortcut
[CTRL-Z] works both as “undo” and “redo”. Since there are multiple
levels of undo in Vim, different keys are defined for either of said
actions.
| Notepad | Vim-only | Description |
|---|---|---|
[CTRL-Z] |
u |
Undo |
[CTRL-Z] |
[CTRL-R] |
Redo |
Cut, Copy, Paste and Delete
The Notepad shortcuts simply don’t work so we have to get used to
the Vim-only ones: y and p.
| Notepad | Vim-only | Description |
|---|---|---|
[CTRL-X] |
x |
Cut |
[CTRL-C] |
y |
Yank (Copy) |
[CTRL-P] |
p |
Paste |
[DEL] |
d |
Delete |
Find and Find Next

Notepad relies on a single Find Form that we use to select the text string to be searched, whether we want to search “Up” or “Down” and whether we want to match the case or not. In Vim, instead, we need to decide whether we want to search up or down first as there is a distinct command for each type of search. However, once we start searching we can easily go up and down using different keys whereas in Notepad we can—apparently—only search forward.
| Notepad | Vim-only | Description |
|---|---|---|
[CTRL-F] |
fc |
Search character c forwards in current line |
[CTRL-F] |
Fc |
Search character c backwards in current line |
[CTRL-F] |
/text |
Search forwards (down) case sensitive |
[CTRL-F] |
/text\c |
Search forwards (down) case insensitive |
[CTRL-F] |
?text |
Search backwards (up) case sensitive |
[CTRL-F] |
?text\c |
Search backwards (up) case insensitive |
[F3] |
n | Search next match |
- |
N | Search previous match |
For example, to find the first occurrence before the cursor of “xmonad” in a case insensitive manner (e.g. match XMonad, Xmonad, xmonad, etc), we type the following command:
1?xmonad\c
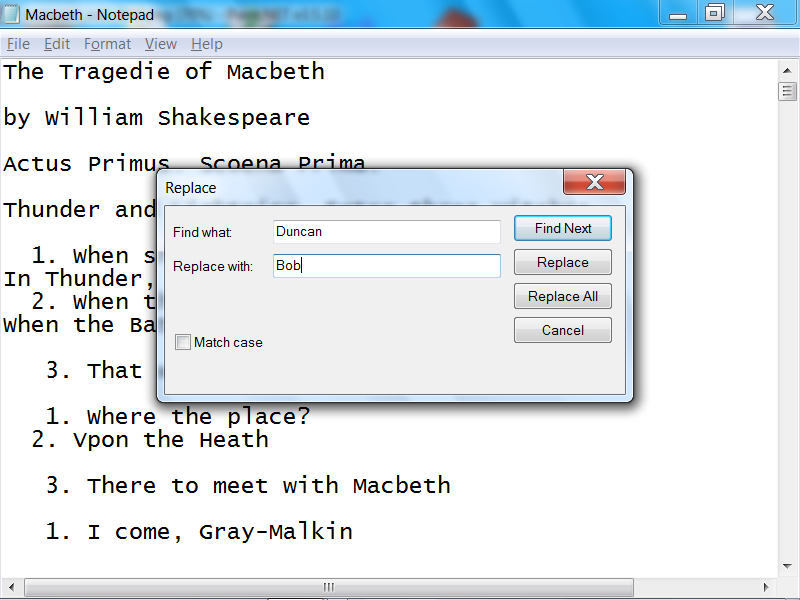
Replace

The Replace Form allows to specify the following options:
- The text to be matched (
old). - The text to be replaced with the match (
new). - Whether to match case (
\c) or (/i). - Whether to find the next occurrence or replace all (
/c).
| Notepad | Vim-only | Description |
|---|---|---|
[CTRL-H] |
:%s/old/new/g |
Replace across entire document |
[CTRL-H] |
:%s/old\c/new/g |
Same as above case insensitive |
[CTRL-H] |
:%s/old/new/gi |
Same as above (alt. syntax) |
[CTRL-H] |
:%s/old/new/gc |
Replace but confirm every change |
Select All
Although there are many ways to achieve the same effect, it is more intuitive to combine the commands explained in the Browsing Text and Selecting Text sections.
1ggyG
Meaning:
gg- jump to the beginning of the documenty- yank (copy)G- jump to the end of the document
Please note that the: the y command, unless it is used the visual
mode (to be covered further on), will wait until the range of the
text to be copied is specified. For example, y$ copies the text
from the cursor’s position until the end of the line.
Inserting Time/Date String
| Notepad | Vim-only | Description |
|---|---|---|
[F5] |
:r !date |
Insert date (Unix) |
[F5] |
:r !date /t |
Insert date (Windows) |
Format Menu

Word Wrap
Word Wrap is a single “toggle” option in Notepad; however, there are two distinct commands for this setting in Vim:
| Vim-only | Description |
|---|---|
:set wrap |
Set wrap on |
:set nowrap |
Set wrap off |
View Menu

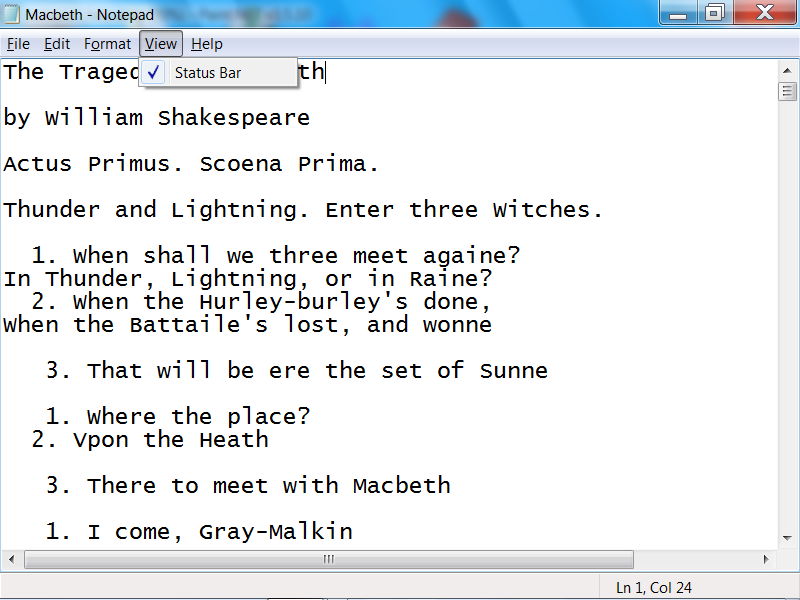
Enabling Status Line
The status line displays the line number and column at which the cursor is currently located.
| Vim-only | Description |
|---|---|
:set ruler |
Show status bar |
:set noruler |
Hide status bar |
Help Menu

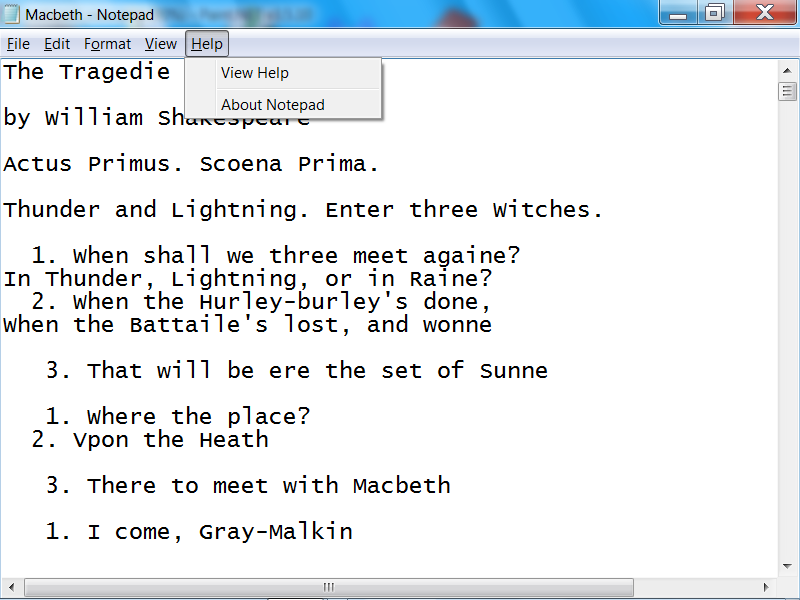
General help may be displayed by pressing [F1] or,
alternatively, by typing :help.
Text Browsing
Browsing text is about scrolling up and down, and moving the cursor to specific locations rather than entering text.
In all cases, Vim needs to be in Normal mode as opposed to Insert
mode, therefore, the assumption is that we have pressed [ESC]
before typing any of the suggested keys and key combinations.
Moving the Cursor Around
Vim, like Notepad, responds to the arrow keys under normal circumstances. However, the arrow keys are considered problematic in Vim for two reasons. The first is that they may not be mapped correctly when using a remote terminal. The second is that the default keys used by Vim are in the so-called “home row” so the typist does not need to move their fingers away in order to move the cursor—which is the most frequently used form of keyboard input.
Developing the muscle memory to get used to the Vim cursor movement keys takes a little while but it is a worthwhile investment.
| Notepad/Vim | Vim Only | Description |
|---|---|---|
| Arrow Left | h |
Move cursor to character on the left |
| Arrow Down | j |
Move cursor to the line below |
| Arrow Up | k |
Move cursor to the line above |
| Arrow Right | l |
Move cursor to character on the right |
Moving the Cursor One Word at a Time
Both Notepad and Vim allow moving the cursor to the next (or
previous) word by pressing [CTRL-Arrow Right] and [CTRL-Arrow Left], respectively. However, the Vim-only keys are recommended
since they do not require [CTRL] and avoid remote terminal
compatibility issues.
| Notepad/Vim | Vim Only | Description |
|---|---|---|
[CTRL+Arrow Right] |
w |
Jump to the beg. of the next word |
[CTRL+Arrow Left] |
b |
Jump to the beg. of the prev word |
Moving the Cursor to The End or Beginning of The Line
Jumping to the beginning or end of a line is such a common use case
that most keyboards have dedicated [Home] and [End] keys for
this purpose. These keys work as expected in Vim but they seldom
map correctly on a remote connection scenario.
| Notepad/Vim | Vim Only | Description |
|---|---|---|
[Home] |
0 |
Jump to the beggining of the line |
[End] |
$ |
Jump to the end of the line |
Moving Up/Down One Page at a Time
Moving upwards and downwards, one page at a time, is performed using the Page Up/Page Down keys and/or by clicking above or below the scroll bar in Notepad. In Vim, the Page Up/Down keys should behave in the same fashion; however, when connecting through a remote terminal, these keys might not work in which case we should look at the default Vim-only shortcuts:
| Notepad/Vim | Vim Only | Description |
|---|---|---|
[CTRL-PgUp] |
[CTRL-B] |
Page Up (Move Backwards) |
[CTRL-PgDn] |
[CTRL-F] |
Page Down (Move Forwards) |
Jumping to the Begging or End of the Document
Pressing [CTRL-Home] and [CTRL-End] have the effect or jumping to
the begging and end of the document, both in Microsoft Notepad and
Vim. However, the default Vim’s shortcut is quicker and works on
a remote connection scenario:
| Notepad/Vim | Vim Only | Description |
|---|---|---|
[CTRL-Home] |
gg |
Jump to the begging of the document |
[CTRL-End] |
G |
Jump to the end of the document |
Text Selection
Most edit commands on Notepad work on the basis of selected text
and/or the current cursor position. In Notepad, text is selected by
holding the left mouse button and moving the cursor from the
selection beginning to the selection end. Alternatively, text can be
selected by moving the cursor using any of the previously discussed
key combinations whilst holding [SHIFT] at the same time.
In Vim, rather than holding [SHIFT], we type v to activate the so
called “Visual mode”. This has the effect of selecting whatever text
sits between the cursor position before v was pressed and that of
of the current cursor position.
Examples:
| Notepad | Vim Only | Description |
|---|---|---|
[SHIFT-Arrow Right] |
vl |
Select one char. to the right |
[SHIFT-Arrow Down] |
vj |
Select one char. to the left |
[SHIFT-CTRL-Arrow Right] |
vw |
Select one word to the right |
[SHIFT-End] |
v$ |
Select until the end of the line |
We return to the Normal mode by simply pressing v again or
by pressing [ESC]. If we want to select complete lines rather than
specific start and end character within the start and end lines,
respectively, we can use V instead.
Text Modification
Vim is called a “modal” editor since its behaviour changes according
to the mode in which it is. For example, when Vim is in Normal mode,
we can move the cursor using h,j,k,l, we can press : to enter
commands and so on. In the “visual” mode, instead, we select text as
we move the cursor using most of the Normal mode commands.
Vim has a so-called “Insert” mode which, as its name suggests, it is meant to “insert” things; namely regular text. Some people4 may suggest that the fact that Vim is either in Normal or Insert mode sets it apart from regular editors such as Notepad which lack such a “modal” nature. What is problematic about this view is that it gives the impression that these modes (Normal, Visual and Insert) have equal weighting and that the user ought to be “concerned” with each mode as though they are likely to spend equal amounts of time in each of them.
Let’s set the record straight. The Normal mode, which is the mode under which we freely move the cursor, and perform operations such as find and replace, is where we are supposed to be most of the time. The other non-Normal modes such as Visual and Insert are meant to achieve a single goal (such as selecting a segment of text or writing a sentence, respectively). Once the goal is achieved, we get back to Normal mode right after.
As we will see, most text modification we do directly from within the Normal mode.
Deleting Text
Deleting one character at a time works like Notepad except
that we have the x and X keys which are sometimes faster
to reach than [Del] and [BackSpace]:
| Notepad/Vim | Vim Only | Description |
|---|---|---|
[Del] |
x |
Delete character under cursor |
[BackSpace] |
X |
Delete character to the left of the cursor |
Although the following commands have no Notepad equivalents, they are essential and worth remembering nevertheless:
| Vim Only | Description |
|---|---|
d |
Delete selected text (or to be selected) |
dd |
Delete current line |
dw |
Delete word under cursor |
The d command’s behaviour is interesting. From a Notepad
perspective, it acts like pressing [Del] when a text selection is
active. However, if no text has been selected, it will wait until we
move the cursor to specify a new text selection to be deleted. For
example, dk will delete the character to the right whereas dG
will delete everything from the current cursor position until the end
of the document.
Joining Lines
In Notepad, if we have two lines that we want to join into one, we
just need to position the cursor after the last character of the
first line and press [DEL] or, alternatively, move the cursor at
the first character of the second line and press [BackSpace].
In Vim, instead, we join two lines, by positioning the cursor on the
first line and pressing J. For example:
1     "The world is my country,
2     science is my relgion."
3       --- Christiaan Huygens
If we position the cursor on the first line and press J, the result
will be:
1     "The world is my country, sience is my relgion."
2        --- Christiaan Huygens
Replacing Text
In this case, we refer to replacing a specific text range as opposed to a “Find and Replace” operation. In Notepad, we usually do this by highlighting the desired text range and typing the desired new text. In Vim, we do this differently according to the nature of the text range.
| Vim Only | Description |
|---|---|
r |
Replace character under cursor |
R .... [ESC] |
Start overwriting text under cursor |
c .... [ESC] |
Change selected text (visual mode) |
cc ... [ESC] |
Change entire line |
cw ... [ESC] |
Change word under cursor |
C .... [ESC] |
Change text until the end of line |
Inserting Text
When inserting text in Vim, unlike Notepad, we need to take two things into account
- Where we want to insert text.
- The fact that we should return to Normal mode right after by
pressing
[ESC].
| Vim Only | Description |
|---|---|
i ... [ESC] |
Insert text before the cursor |
I ... [ESC] |
Insert text at the start of the line |
a ... [ESC] |
Append text to the right of the cursor |
A ... [ESC] |
Append text to the end of the line |
o ... [ESC] |
Insert text below the current line |
O ... [ESC] |
Insert text above the current line |